
This is a walkthrough and setup guide to the ‘2-in-1 Aquarium overflow and Protein Skimmer’ found on Printables and Thingiverse.
Since this is a hefty document, I decided to publish it here on my homepage for easier maintenance. I hope you don’t mind (and as you can see, no ads, no snooping nor anything else).
Jump directly to
Introduction
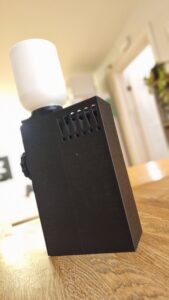
After over half a year of testing, numerous adjustments and iterations – and probably stressing out my aquarium more than I should – I must admit that I’m a little bit proud to present a user-friendly, easy-to-print 2-in-1 aquarium overflow and protein skimmer.
Though I primarily made it for my aquarium setup and needs, after seeing how well it worked, I decided to share it in hopes that others would like it as well. It features several small niceties, such as a water inlet that optimizes for top-water removal, using magnets instead of suction cups, a ‘vacation’ option for skimmer waste overflow, snap-on piping for secure fitting, and much more.
So have a look, and if you decide to try it, please note these tips:
- Although the models don’t need supports (except the ‘converter’) or brims, the latter might help with the main model if you sometimes have issues with models warping from the print bed.
- The screws and threads are made very tight on purpose to hinder water from entering the magnet compartment. You might need to screw/unscrew the part(s) repeatedly to loosen it enough to be able to screw it fully into the filter box to ensure a water-tight fit. Be patient when doing this.
- Also note that most pictures/blueprints on this site can be clicked to view larger, zoomable, or downloadable versions.
Design highlights
Dimensions
- Height:229mm.
- Width: 149mm.
- Depth: 69mm.
Two-in-one filtering solution
I have a small aquarium, so space is a premium to me (or rather, to the inhabitants in it). Furthermore, I hate an aquarium full of equipment, so I thought ‘Why not try to combine several of these into one’? Thus this design is a box that houses both an overflow (with filter), a protein skimmer, and a place to nicely integrate and hide all pipes associated with it 🙂
Water intake – the exclamation point design
The main water intake chamber has !-formed slits. They are made more open towards the top to promote more water flow from the top. This can help accelerate removal of the top water film which sometimes can be a problem.
I Initially had slits on both the front and right side of the overflow chamber, but through a lot (!) of testing I noticed it allowed for so much water simultaneously that it did not create enough ‘pull’ into it. By reducing the intake slits to the front only, I got a much more forceful intake, sucking debris and top-layer film into the overflow 🙂
Please note that a downside of this design is that it has a narrow window for water intake. If your aquarium evaporates a lot of water and the water level fluctuates, you might want to consider using an auto top-off solution to ensure stable water levels and avoid the overflow from going dry and sucking air.
Protein skimmer with optional waste removal solutions
The main focus of the protein skimmer was to optimize the space for skimming, but at the same time as best as I could hinder too many air bubbles to return into the aquarium. The result is a two-chamber solution that can house a big air woodstone with excellent skimming. I spent quite a bit of prototyping and testing to come up with the optimal water-in/water-out to reduce air-bubble return.
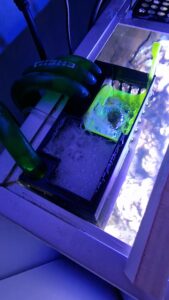
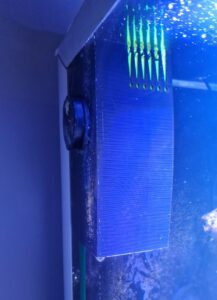
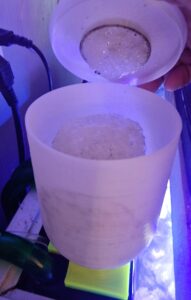
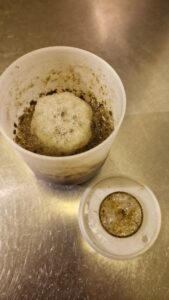
Gallery
Here are some photos of the prototypes, testing in the aquarium, and the final model (in no particular order).
Buy me a coffee
My Fusion360 license prohibits me from selling this model, which I absolutely will honor. But if it works well for you and you are happy with it, I’d love a cup of coffee from you, images of your make, and/or a nice review on either Printables or Thingiverse. Thanks in advance.
How to set up
Here’s a quick walkthrough.
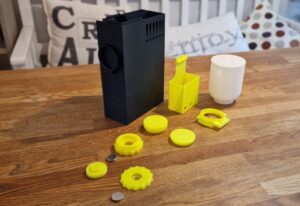
Parts overview
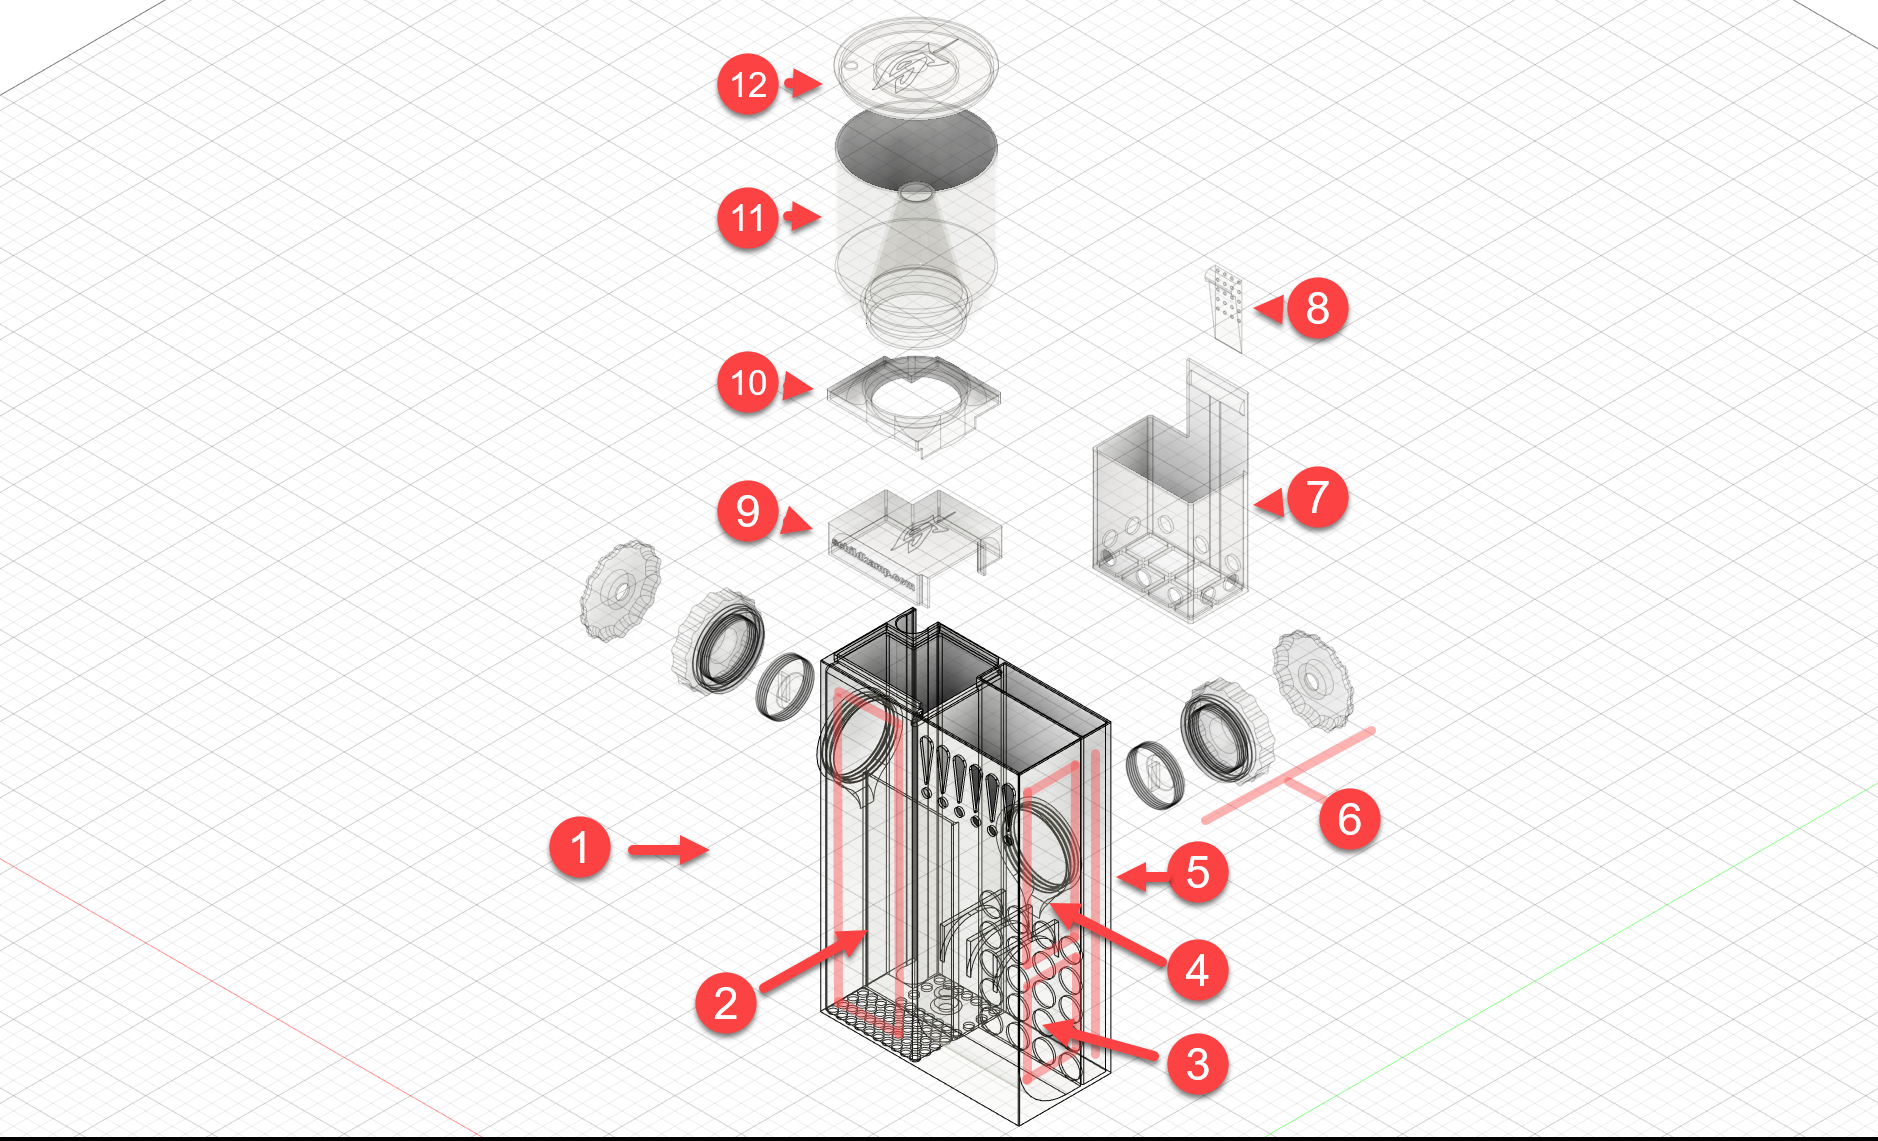
- Main body
- Protein skimmer chamber/part
- Flow chamber
- Overflow/intake chamber
- Space for water out-pipes
- Outside glass magnet
- Overflow filter basket
- Pin/peg to hold/adjust filter basket height
- Skimmer-to-overflow cap
- Skimmer-to-collector cap
- Skimmer waste collector cup
- Collector cup lid
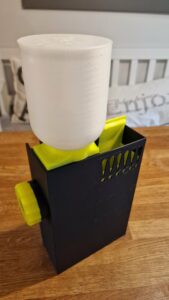
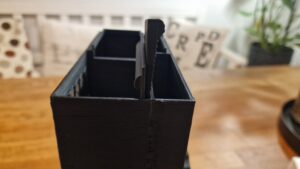
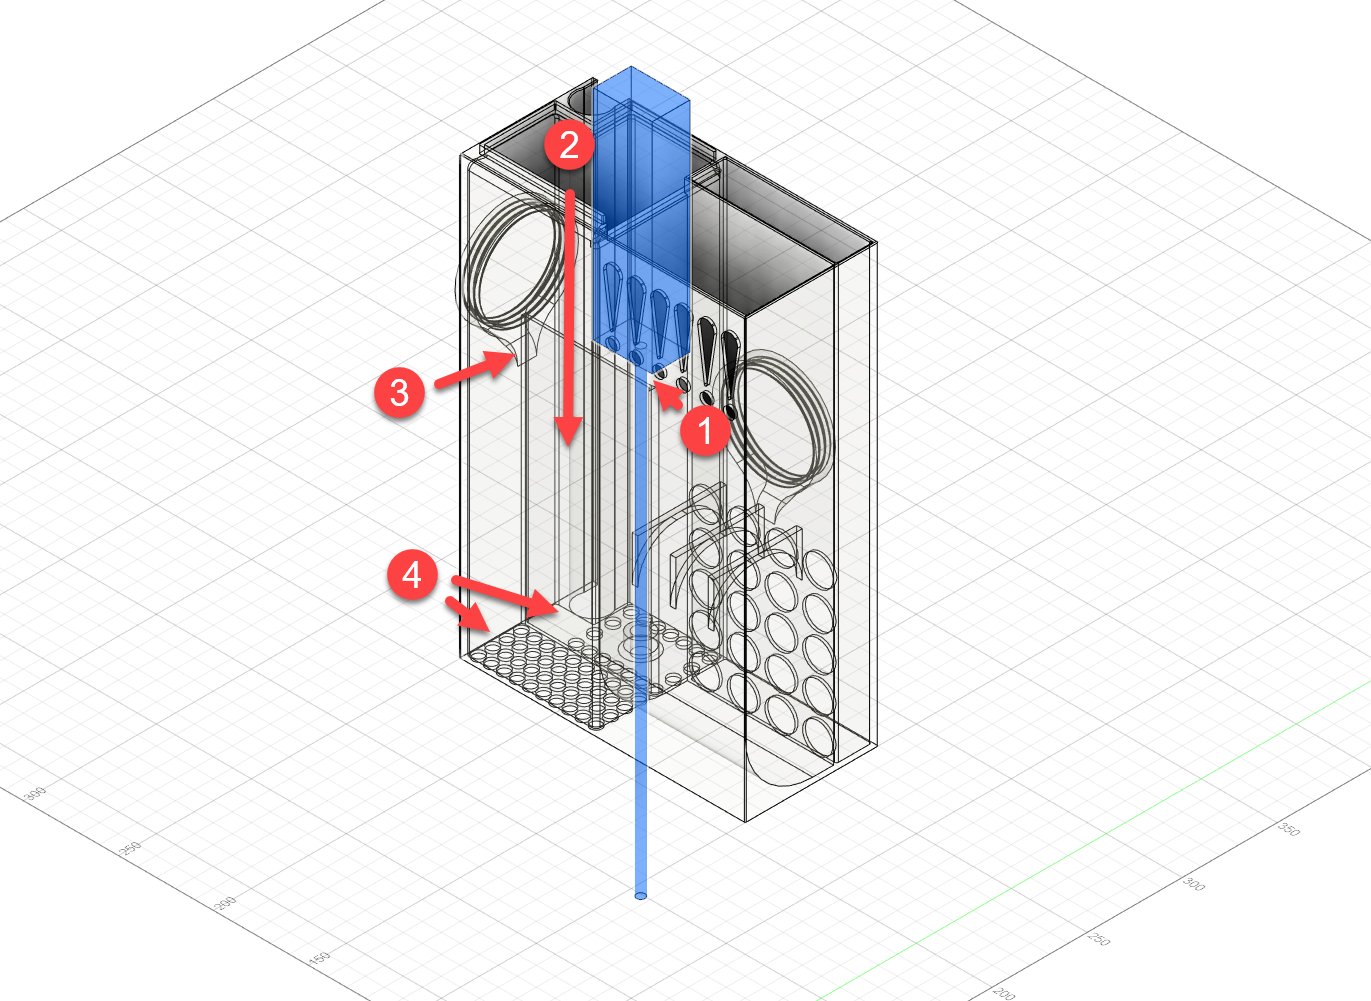
Overflow chamber and (optional) filter basket
The overflow chamber (2) is one of the two water intakes in this setup. !-formed slits will ensure a powerful inflow of water, and hopefully more from the top.
There is space for a filter basket in this chamber and there are dividers between it room and the room below, both to act as a stop/support for the filter basket but also to ensure that the room below is open and free for any blockage that could cause problems with the water flow to the outtake pipes. This lower room also has a sloping bottom towards the back intake which ensures that no debris can find a corner and/or stick in this chamber but is properly sucked out of the overflow.
You can use the filter basket as a simple prefilter by putting your preferred filter(s) in it and setting it into the main overflow chamber. I recommend you only use a very coarse prefilter pad to ensure maximum water flow at all times. Setting it all the way down into the overflow ensures that it rests on the internal base made for it, and keeps the intake slits unblocked and open for maximum water intake at all times.
However, by using the included pin/peg as a wedge between the main chamber back wall and the filter basket, you can adjust the basket’s position (height) in the chamber to partially block the intake slits and thus adjust the flow into the overflow (4). This enables you to adjust the water intake and create an even stronger top-water intake. Be careful so you don’t let too little water into the overflow (I’ve done so several times).
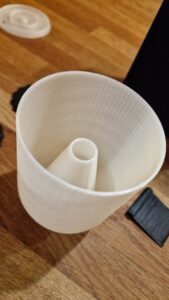
Protein skimmer
The second water intake and purification method is through protein skimming. The skimmer is divided into two chambers, the intake and skimming part, and the return chamber.
Note that there are a lot more water outlet holes than inlet ones, which creates an unequal in/out water flow ratio (‘relaxed’ outflow’). This is done to prevent too many air bubbles from returning to the aquarium.
Also, the dividing wall between the two chambers forces the bubble upwards instead of being sucked sidewards and out – again, to prevent bubbles – with the benefit of maximum time to bond with waste particles.
To use it, simply insert your preferred airstone/wood into the chamber, pulling the air pipe through the (somewhat larger) hole in the bottom. The dimension of this hole should provide some resistance to the pipe when fully inserted to hold the airstone securely in place.
Please ensure that is a little bit of free space around the airstone/wood.
Alternative skimmer-tops
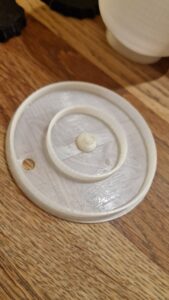
I’ve provided two skimmer collector options; one that will overflow the skimmer waste into the other overflow chamber (1,2) and thus pull this waste through your external filtering option, or a (recommended) skimmer waste cup that will remove it completely from the aquarium.
The first provides a simple, self-contained way of removing waste (useful when on vacation and not being able to empty the container from time to time), although you have to ensure good external filtering (a sump or a canister filter), and the second provides optimal waste removal but requires you to empty the collector cup from time to time.
Please note that it is highly recommended to have an adjustable air pump so that you can fine-tune the airflow to your optimal liking. Also, note that it normally takes a day or two before ‘normal’ skimming occurs. Have this in mind when you see far too much or too little bubbles/skim forming when you start up the protein skimmer.
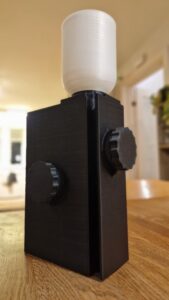
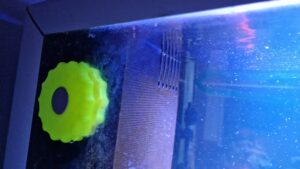
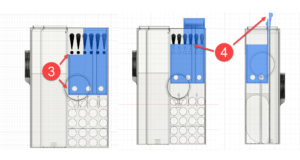
Modular magnet attachment to glass

Though if using a correct size outlet-pipe the box should be secured enough, I still recommend using powerful magnets to adhere it to the aquarium glass. For this, you’ll need to purchase four 20mm. x 5mm. magnets, and the more powerful they are, the better.
Note that you need to print two of each part (Screw_inside, Screw_outside, and Screw_plug)
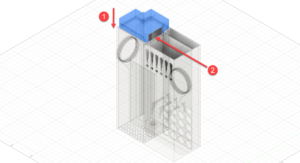
Put a small amount of not-too-powerful glue inside the outer grip (1, above), and stick one magnet inside it. Note the small hole here. It is intended to push loose the magnet again later if you should want to recover it for other use (which is the reason not to use too powerful glue).
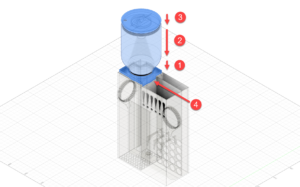
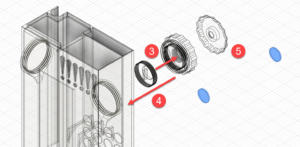
For the (magnet) part to be inside the aquarium, do NOT use glue if you want to recover the magnet later on. Please insert it into part (2) and make sure to test that the magnets work (stick together, not turned the wrong way from each other). Then screw the closing lid tightly into the part (3) so that they are flush to each other. This (together with the next step) should ensure no water can enter the magnet chamber.
Lastly, screw this part into the filter box itself (4). Note that all thread parts (3 and 4) are designed tight on purpose, so you might need to screw/unscrew the past(s) repeatedly to loosen it enough to be able to screw it fully into the filter box to ensure a water-tight fit. Be patient when doing this.
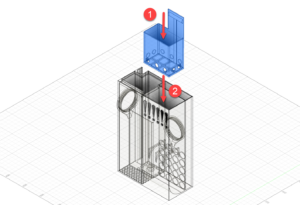
In- and outlet piping
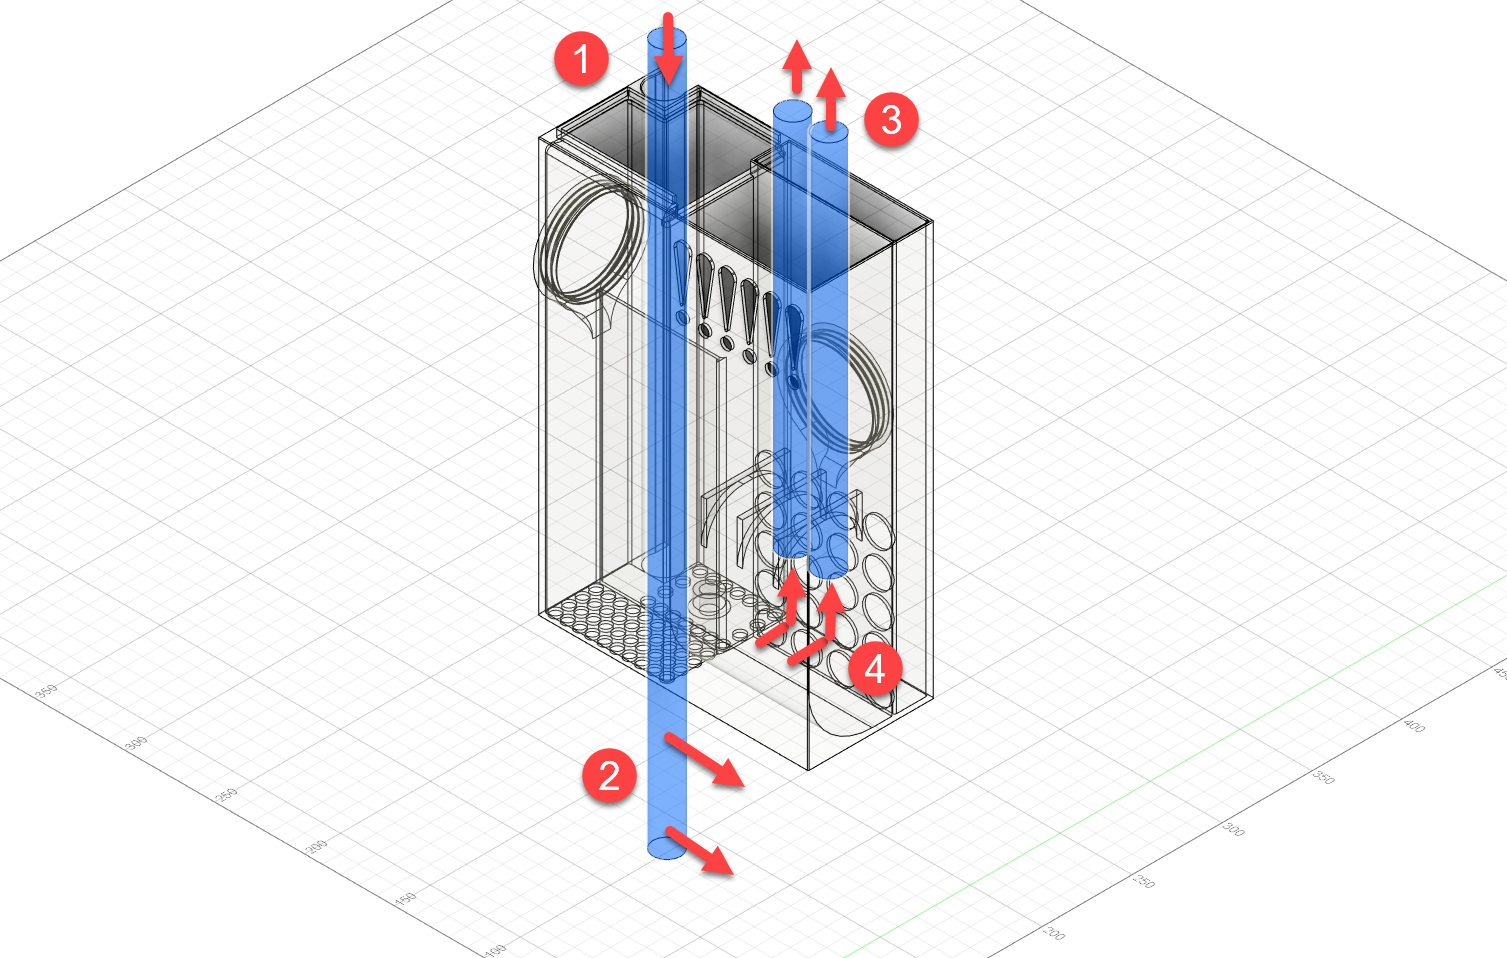
The filter box has place for multiple outlet pipes and one return pipe. The outlet pipes are put into the back chamber (3), while the return pipe can be clicked into place on the back (1). Ensure un-hindered return outlet holes (2).
That should be all.
Enjoy, and please give me feedback if you have any ideas on how to improve the design.